Producing useful videos for your course is not as simple as one might think. Most trainers and teachers struggle with producing clear, easy-to-watch videos.
It’s partly because they might lack the appropriate video editing tool. Good videos generally require step-by-step illustrations for students to fully grasp every element of the lesson.
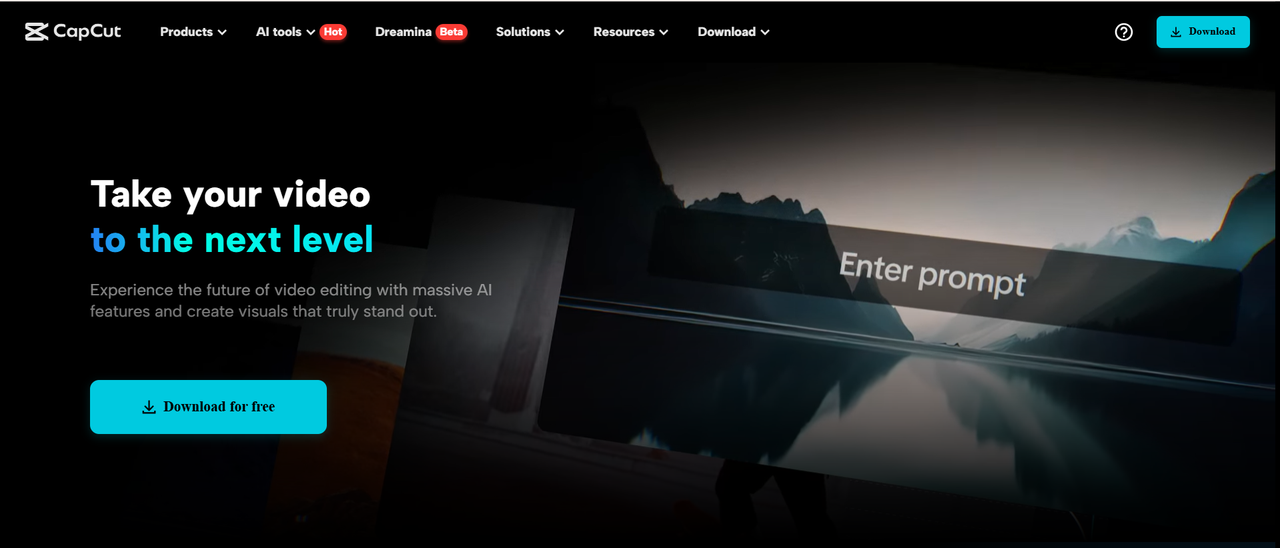
That’s where the desktop video editor on CapCut can assist you. It allows you to construct your videos in straightforward steps.
With this tutorial, you’ll find out how to use CapCut PC to produce videos that are easy to watch and easy to learn from.
Why Step-by-Step Visuals Matter in Instructional Videos
Step-by-step visuals aid students in learning. If you present one step at a time, learners are able to keep up with less confusion.
For instance, if you are demonstrating how to solve a mathematical problem, demonstrating each step keeps the student attentive. The same applies when demonstrating how to use software or a tool.
If all the steps are demonstrated together or in a jumbled manner, students get confused. They lose track of the point or don’t know what comes next.
This is why simple and clean graphics do count. You can have all parts of your video in order with the desktop video editor by CapCut.
You can use software such as text to speech to read every step out and narrate as you show. This assists those who learn faster by listening rather than viewing.
Why Use CapCut PC for Step-by-Step Instructional Videos
The CapCut desktop video editor offers a lot of features to make clear and tidy videos. You can cut clips, sequence them in the order you want, and adjust the timeline to align with every step of your lesson.
It also suits screen recordings well, which is ideal for demonstrating how to use software or websites. You can insert text, arrows, zoom, and smooth transitions between steps.
This allows all sections to be easily visible and accessible. Although CapCut PC is free to download, there are some tools, such as advanced effects and templates, that require payment.
With the free version, you can still edit and save your videos without a watermark. You can also make simple visual sections using intelligent tools such as an AI video generator without requiring a camera.
This comes in handy when you wish to explain something using graphics rather than recording yourself.
Steps to Create Instructional Videos with Step-by-Step Visuals in CapCut PC
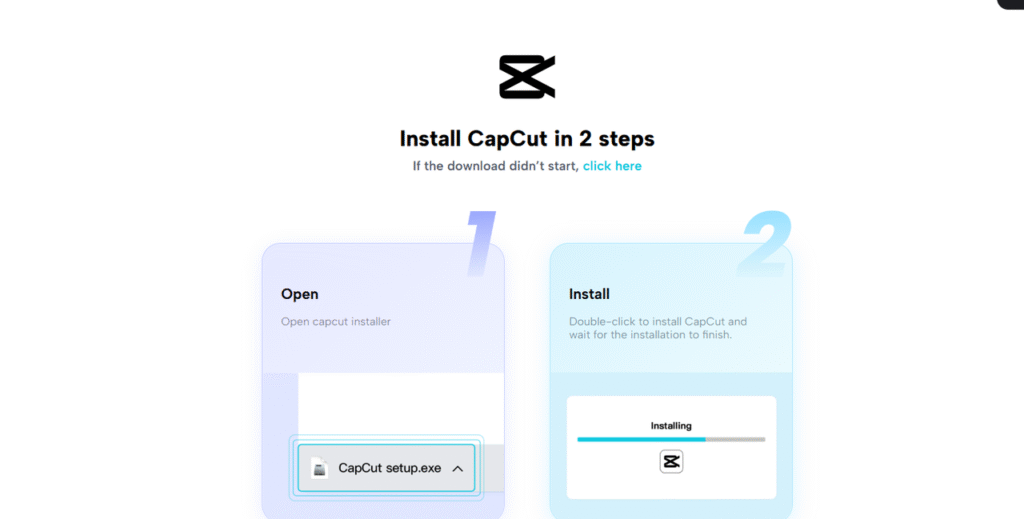
Step 1: Download CapCut PC from the Official Website
To begin, go to the official CapCut website. Download the CapCut desktop video editor. Make sure not to install the mobile version. This guide is only for the desktop version.
Once the download finishes, open the file and click through the steps to install it. You can use the software on both Windows and macOS.
After installing, open the editor and log in using your email or social account. Logging in saves your work and provides access to all the editing tools.
Once logged in, you get a simple and minimal layout that is easy to navigate. This is ideal for beginners, especially teachers and creators who are just starting. You are now set to start your video project.
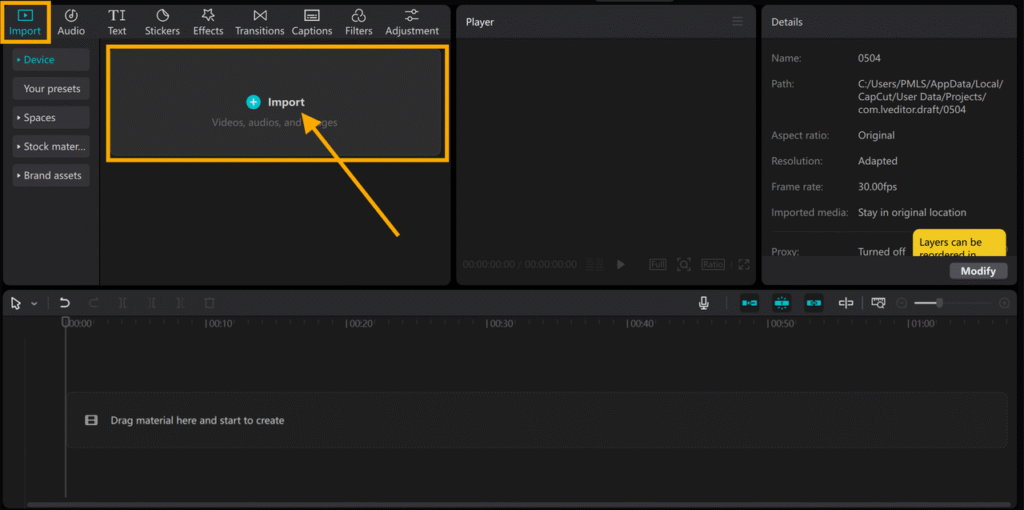
Step 2: Import Your Video
You are now within the CapCut desktop video editor. Beginning a new project. Click on ‘New Project’ on the home screen to start editing your video.
Next, tap “Import” at the top left to upload your video. You can drag your file directly into the media section if that is more convenient. If you would prefer to use a screen recording, you may first record it with the CapCut screen recorder.
This will work nicely if you are demonstrating how to do something on your screen in a step-by-step format. After adding your file, drag it onto the timeline below.
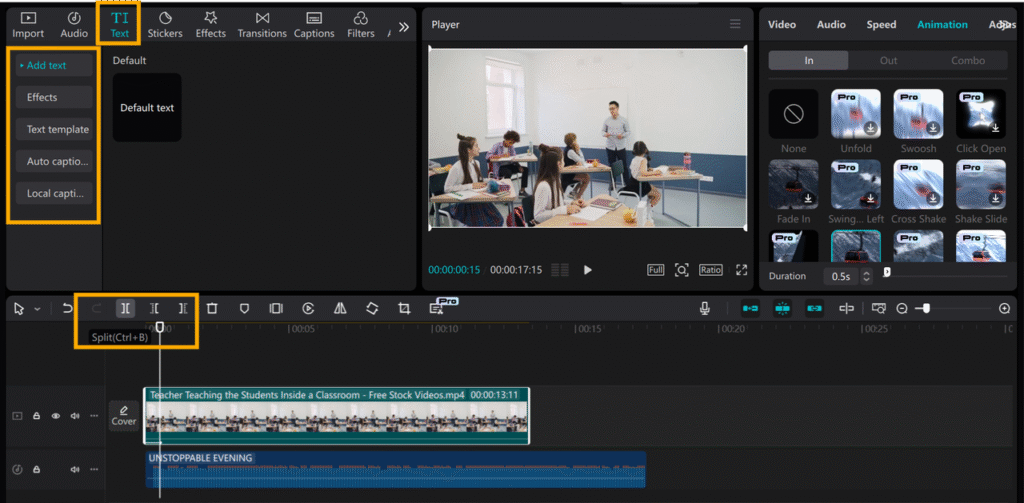
Step 3: Add Step-by-Step Visuals with Overlays and Text
To split your video into steps, drag the playhead along the timeline to the point at which you would like to cut. Click the ‘Split’ button above the timeline to cut your video into sections.
Repeat this for each segment where a new step starts. This aids in keeping your content organized. Then, insert text boxes for each step.
At the top menu, click ‘Text’, then click ‘Add Text’ to type on your video. Label each section using simple words. You can even insert arrows and shapes by going to “Stickers”.
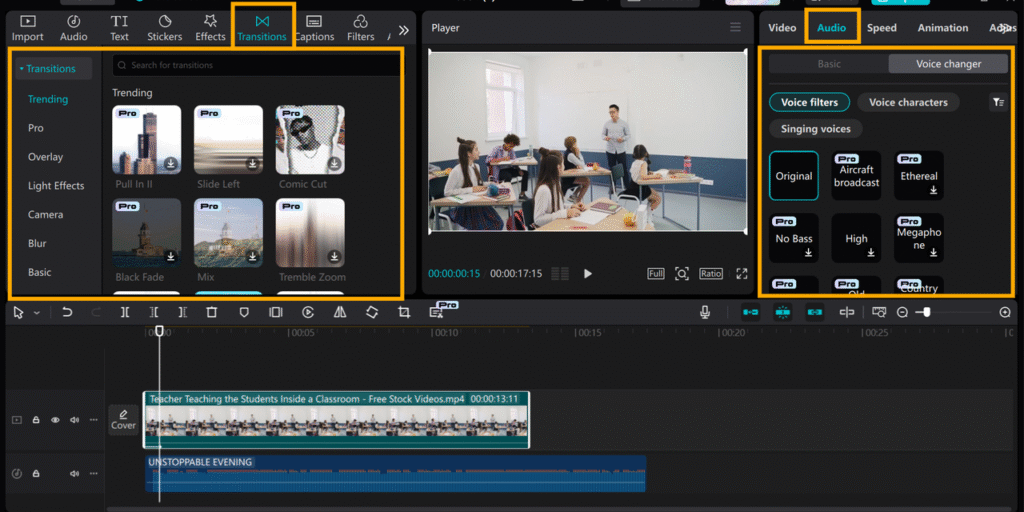
Step 4: Improve Audio and Include Smooth Transitions
If the audio in your video is unclear or distracting, click the audio clip in the timeline to start editing it. Choose “Voice Changer” from the toolbar. Select the effect you wish to use to enhance or alter the voice.
This will make the audio clearer so that learners will be able to concentrate on the lesson. Secondly, to get the video to flow smoothly, go to the “Transition” tab at the top of the screen.
Choose the transition you like, then drag and drop it between two clips on the timeline. These actions will make your video more interesting and easier to listen to.
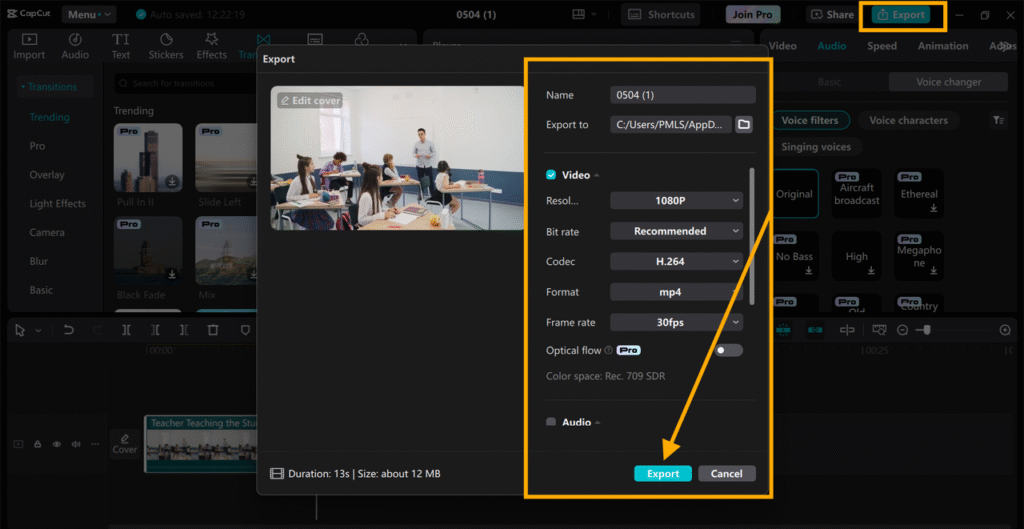
Step 5: Export and Share
When you finish editing, click the ‘Export’ button in the top right corner to save your video. Select your video resolution and file type. 1080p is best for most online purposes.
You can upload the video to YouTube, your learning environment, or send it to your students. Exporting is free, but certain presets, such as 4K or higher settings, require payment.
Conclusion
The CapCut desktop video editor is easier to use for teaching with concise step-by-step videos. You can make learning easier for your students by using cuts, text, and basic effects.
Even though a few tools are paid, most basic features are free and straightforward. You don’t need to be an expert to get started.
Just follow these steps and notice the difference. Attempt your subsequent lesson in step-by-step visualizations utilizing CapCut PC and provide more clarity to your students.