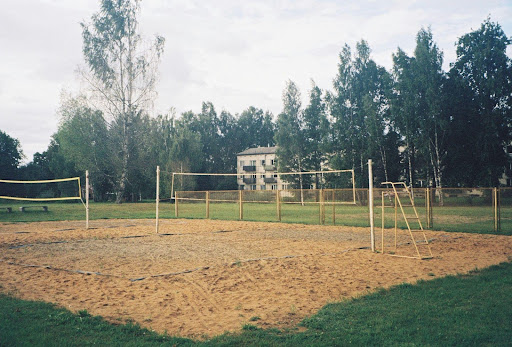
Whether you’re a golfer trying to dial in your swing or a baseball enthusiast looking to sharpen your timing, having your own backyard practice setup can be a game-changer. The good news? You don’t need a massive budget or a professional facility to create one. With a few smart tools and some creativity, you can build a practice range right at home—no private coach required.
While professional players may rely on premium tools like TrackMan for performance analytics, many at-home athletes are turning to more affordable Trackman alternative devices to simulate the same kind of feedback. From launch monitors to DIY targets, this guide walks you through the steps to create a customized backyard training zone—without emptying your wallet.
Why Build a Backyard Practice Range?
The benefits go beyond convenience. Practicing in your own space allows for:
- Consistent training without travel
- Cost savings on range or facility fees
- Improved repetition that builds muscle memory
- Stress-free environment to experiment and improve
And thanks to advances in consumer-grade sports tech, it’s now easier than ever to bring meaningful data and feedback into your training routine.
Step 1: Pick the Right Space
Before you start buying gear, decide where and how much space you have to work with. The ideal area should:
- Be flat and safe from obstacles (trees, windows, etc.)
- Provide at least 10–15 feet of depth (for golf or baseball hitting)
- Be shielded from wind if possible (this helps with accurate data)
Pro tip: If you have limited yard space, don’t rule out your garage, driveway, or basement—many home simulators and nets are designed to fit smaller indoor environments.
Step 2: Invest in a Portable Net or Enclosure
Image from Unsplash
A quality hitting or pitching net is your foundation. It protects your surroundings and gives you a visual target to aim for.
What to look for:
- Durable material (nylon or polyester mesh)
- Steel or carbon fiber frame
- Easy assembly and disassembly
Popular options:
- Golf: Rukket Sports Haack Net, GoSports Golf Practice Net
- Baseball: PowerNet Baseball Softball Practice Net
If you want to go the extra mile, a portable cage enclosure can offer full 360-degree protection, especially for stronger hitters or errant swings.
Step 3: Add a Hitting Mat or Turf Surface
You don’t want to tear up your grass—or your knees. A hitting mat or turf pad mimics the feel of real play while giving you a reliable surface to practice on.
- For golf, look for a mat that includes multiple turf heights to simulate rough and fairway
- For baseball or softball, try an artificial turf pitching mound or batting mat with marked zones
Most backyard mats are sized for portability (around 3′ x 5′) and can be rolled up for easy storage.
Step 4: Choose an Affordable Data-Tracking Tool
This is where the magic happens. You don’t need to spend thousands to get actionable feedback on your performance. A number of affordable tools now rival the data quality once reserved for professionals.
Golf:
- Indoor Golf Outlet track swing speed, ball flight, carry distance, and spin rates—key metrics for any golfer trying to improve.
Baseball:
- Devices like Blast Motion or Diamond Kinetics provide swing timing, bat speed, and barrel accuracy via a smartphone app.
These tools use built-in sensors or radar technology to give you real-time feedback after every swing or throw.
Step 5: Incorporate Visual Aids and Targets
Training with purpose means more than just hitting balls—it’s about aiming, adjusting, and analyzing.
Try adding:
- Hanging strike zone targets or golf chipping nets
- Pitching targets with different strike zone zones for pitchers
- DIY bullseye-style tarps made from drop cloth and spray paint
Bonus: Add colored flags, cones, or string lines to help with alignment and consistency.
Step 6: Record and Review with Video
Use your smartphone or tablet to record swings or throws from different angles. This is one of the most underrated yet effective training techniques.
Combine with analysis apps like:
- Coach’s Eye or Hudl Technique (slow-motion playback)
- Ubersense for motion tracking and side-by-side comparisons
According to Wikipedia’s entry on motion capture, even basic video analysis can identify patterns and correct biomechanical inefficiencies—something that used to require expensive lab setups.
Step 7: Add Lighting for Evening Practice (Optional)
If your schedule means late-night training, outdoor LED floodlights or garage lighting setups can help extend your sessions.
Just make sure they are:
- Weatherproof
- Mounted safely and away from your hitting zone
- Adjustable to reduce glare
For indoor setups, even a couple of well-placed clip-on lamps can drastically improve visibility.
Step 8: Stay Safe and Respectful
Image from Unsplash
Don’t overlook basic safety:
- Always check your netting and frame stability
- Wear proper footwear and safety glasses if needed
- If you’re in a shared space (like an apartment complex), communicate with neighbors to avoid surprises
Adding a simple practice sign (e.g., “Golf Practice In Progress”) is a small gesture that goes a long way.
Estimated Budget Breakdown
Here’s a ballpark estimate for a fully functional backyard range:
| Item | Price Range |
| Practice Net / Enclosure | $60 – $250 |
| Hitting Mat / Turf | $50 – $150 |
| Launch Monitor / Tracker | $250 – $800 |
| Targets & Visual Aids | $20 – $50 |
| Video Setup (Tripod + App) | $15 – $40 |
| Optional Lighting | $30 – $100 |
Total: Approx. $400 – $1,300, depending on your selections
Compared to monthly coaching fees or range memberships, this one-time investment pays off quickly.
Building a backyard practice range doesn’t require pro-level money or space. With smart equipment and strategic layout you can transform your backyard into a dynamic training zone. Whether you’re refining your swing, improving your timing, or just blowing off steam after work, this DIY setup puts progress in your hands—without stepping foot off your property.

